Make Perfect Pizzas
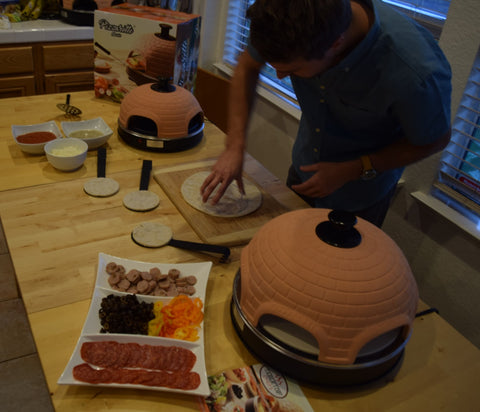
Hello & welcome to your new Pizzarette - we're excited for you! We wanted to share with you some tips and tricks on how to create the perfect mini pizzas before you get started!
First, please read the accompanying instruction manual that came with your Pizzarette thoroughly in order to learn how to assemble the unit, to clean and care for it, to read very important safety instructions, and to get the most out of your new Pizzarette. Now that you've read the safety information, check out this short step-by-step video introduction to give you an overview of how it works!
Once you have all of your ingredients and dough, please follow these instructions to make the perfect mini pizzas!
- Place the unit on a clean, flat, stable surface, such as a table.
- Apply some cooking spray or a little bit of oil on a cloth or paper towel to the cooking plate in order to prevent the pizzas from sticking. If you have a model with the cooking stone, please do not apply any oil or spray to the cooking stone.
- For either model, be sure to apply some extra flour to the dough before cooking in order to prevent sticking to the spatula or the cooking surface.
- When you're ready to use the Pizzarette, plug it in. Important: at this time the oven will turn on and the light will turn on indicating that the unit is on and heating up.
- If you are using ready-made dough, roll it out very thin and then cut it with the dough cutter just before starting. Make sure the there is enough flour on the dough pieces to prevent them from sticking together. If you're making the dough yourself, make it and let it rise. After preparing all other ingredients and once you're fully ready, then roll the dough out and cut it with the dough cutter just before you are ready to cook the mini pizzas. This is important because if you cut it too soon before you're ready, the dough will rise too much and also begin to stick together.
- Once again, be sure to press the dough down very thin. The dough will rise to the appropriate thickness in the oven.
- It is best to use your fingers or a spoon to depress the interior of the dough in order to make a bit of a bowl with the dough, with the outside edge of the crust being slightly taller than the inside (where the sauce and toppings will go). This helps to prevent the pizza and the toppings from rising too much while cooking, which could cause problems when removing the pizza from the oven. This also helps prevent the bottom from cooking faster than the inside part of the pizza.
- Add your sauces, toppings, cheese, etc. but be sure not to pile it too high for reasons just mentioned in the previous bullet. Less is more here.
- If you are using the black plastic spatulas, at this point apply some flour or some oil or cooking spray to the spatula in order to prevent the dough from sticking to the spatula.
- If 10-15 minutes has passed, the oven should be ready for your pizzas.
- Slide the pizzas into the oven. If the pizzas are sticking to the spatula, use a fork to help you push the pizza off of the spatula and onto the oven.
- If you are cooking with a metal spatula, those are designed to stay underneath the pizza in the oven while it is cooking. DO NOT leave the black plastic spatulas in the oven, or they will melt onto the unit and destroy the spatula and potentially the oven.
- Watch as the pizzas are cooking and rising. Be sure to check the bottoms of the pizza within the first 5 minutes to make sure the bottom isn't cooking much faster than the interior.
- The pizzas should not be left in the oven for more than 7 minutes without being checked and depending on how tall they are, sometimes as little as 4 minutes is enough. (Tall pizzas can take 10-15 minutes and that's okay, just keep an eye on them.)
- Once the pizza is done, slide the black plastic spatula underneath the pizza with some force in order to get underneath it and not push it further into the oven. (Metal spatulas, since they are left in, can simply be removed with the accompanying pizza at this stage.)

- If you happen to push the pizza further in, the best way to remove it is to remove the dome very carefully using the top black knob in order to use a fork or another spatula as a backstop to help you get the pizza onto the spatula for removal from the oven. From there, please replace the top to keep the oven at the right temperature for the other mini pizzas.
- Once done cooking all the pizzas, unplug the oven, and be sure to let the unit cool down for at least 30 minutes before cleaning and storing.
- You should never run water on the terracotta dome to prevent cracking and damaging the dome. If the dome needs to be cleaned, please use warm water and a very soft brush or cloth to spot-clean.
- Read this for how to properly clean the Pizzarette once done.

That's it! We'd love to hear about your own personal tips that we can share with others in addition to your feedback and favorite recipes by emailing us at info@tabletopchefs.com. Enjoy!